Audiovisual technology in classrooms and seminar rooms in Karlín
Table of contents:
- General information
- Classroom K2, K3, K4, K5, K6, K7, K8, K9, K10A, K10B, K11 and seminar rooms (KNM, MU, KA, KMA, KPMS)
- Classroom K1
General information
In the Karlín building, all classrooms (with the exception of the K12 classroom) and seminar rooms (with the exception of the KDM, where there is special equipment) are equipped with audiovisual technology. In each such room there is a new projector, two speakers and where there was a screen, there is a new screen with dimensions adapted to the new projectors (KPMS and KMA are in the process of being resolved).
In classrooms K2, K3, K4, K6, K11 there are (as before) stationary computers that can be used for projection. Laptop connection and projector control using a small button panel is uniform in all classrooms except K1, where microphones (headset and handheld) can also be used and control of the window blinds is also possible from the new control panel, which is touch screen.
Remote controls are no longer used to control the projector, only the control panel on the wall.
If you are unclear or need assistance with the projector, please contact the persons who have been trained in the use of audiovisual technology (Crkalová - line 3218, Richter, Trčka - line 3206, Ulrych - 3216).
Classrooms K2, K3, K4, K5, K6, K7, K8, K9, K10A, K10B, K11 and seminar rooms (KNM, MU, KA, KMA, KPMS)
The projectors' connection points allow connection of a laptop or PC via HDMI connector and VGA connector (with possible audio input).
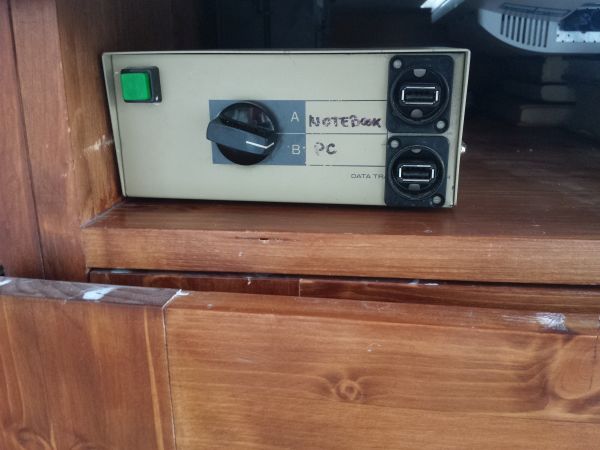
There are computer cabinets in classrooms K2, K3, K4, K6 and K11. If you are connecting a laptop via VGA in these classrooms, you must connect it with the VGA cable that runs from the computer cabinet and then select the "NOTEBOOK" position on the switch on the right side of the cabinet.
The control panel is only functional if a button on it is lit. If there is a large projector switch near the connection point, leave it permanently on. All cables for laptop connections remain permanently in the auditorium.
- Turn on the computer in the cabinet and make sure it is plugged into the PC connector or connect the laptop with an HDMI or VGA cable.
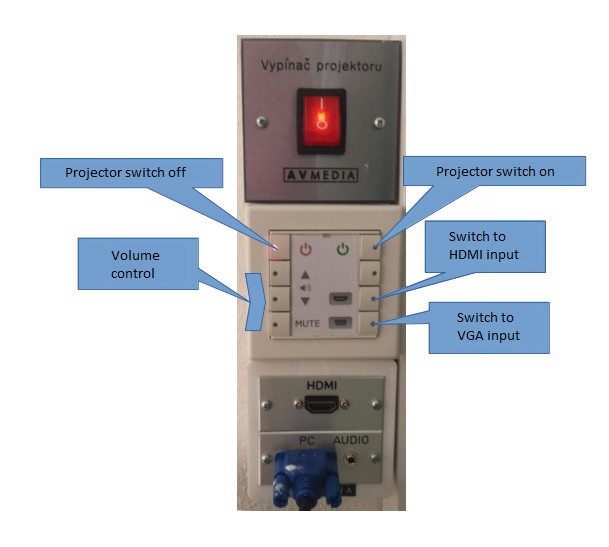
- Turn on the projector on the control panel (green button in the upper right corner).
- If the projector does not correctly detect the connected input within a few seconds, use the bottom two buttons on the right side of the panel to select HDMI or VGA depending on which connector the PC or laptop is connected to.
- If you also want to play audio and are using a VGA connection, the audio output from the laptop must be connected to the AUDIO connector on the connector panel. The three lower buttons on the left side are used to control the volume or mute the audio (and at the same time the video).
- When the projection is finished, turn off the projector with the small red button in the upper left corner of the control panel. The projector will turn off the image and when it cools down, it will turn off completely.
- Leave the projector's large power switch on, and leave the cables to the connection point in the auditorium.
- If the LEDs on the buttons are flashing, the panel is waiting for the previous action to complete and the control cannot be used until the LEDs stop flashing.
Classroom K1
Detailed instructions and information:
|
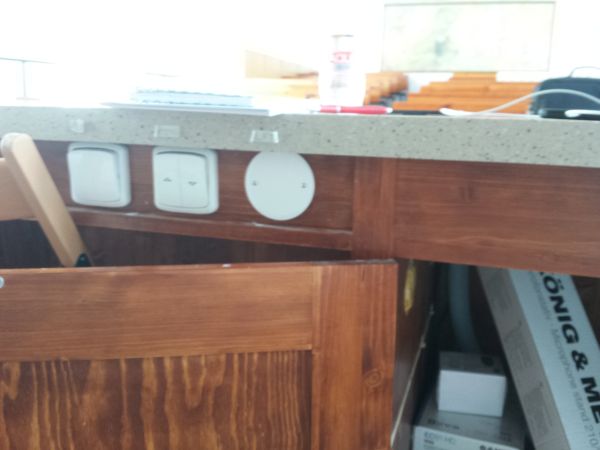
Window blinds can be controlled by the right double switch under the table top (all roller blinds are pulled down and up at the same time). Fluorescent lights pointing on the side and/or centre board can be lit by the left double switch under the table top. |
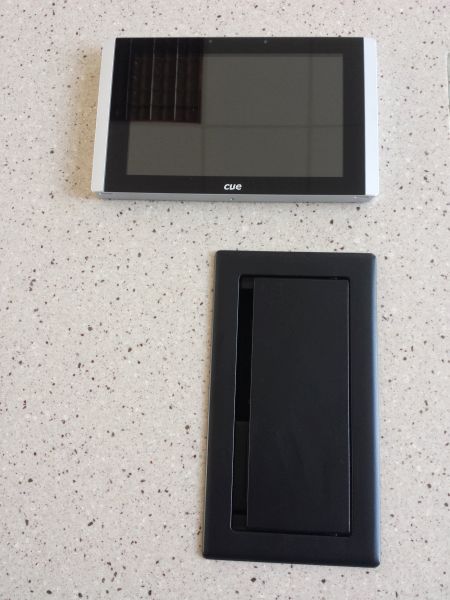
Next to the monitor in the table top there is a touch control panel (top) and a laptop connection point (under the metal hinged lid at the bottom). |
|
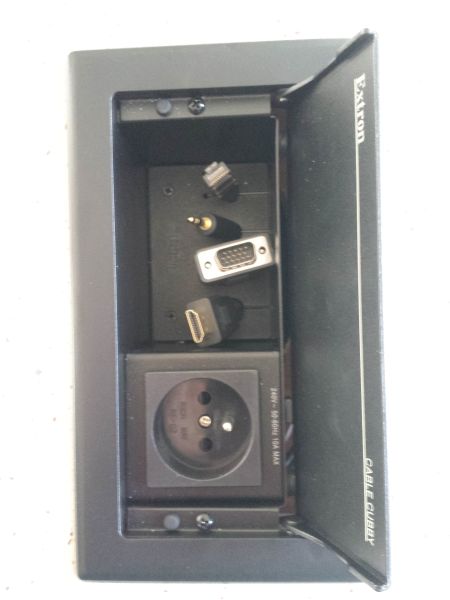
If you want to project from a PC in the teacher's desk, turn it on with the green button on the box under the desk top. The keyboard and mouse are next to the box. If you have your own USB flash drive, it can be plugged into the USB connector on the box. |
If you want to project from a laptop, connect it with a suitable cable (HDMI or VGA - possibly also audio), which you pull out of the connection point when the lid is off. |
|
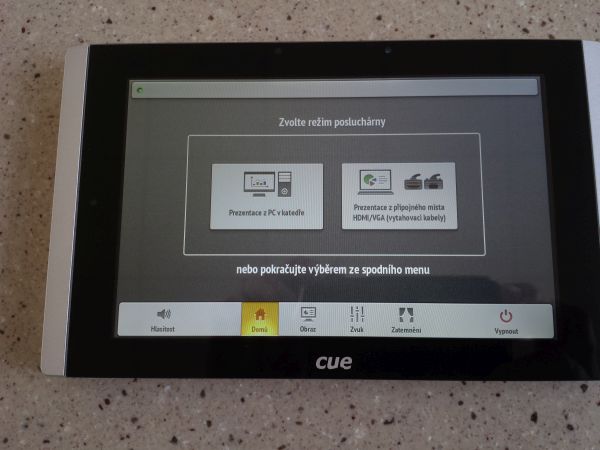
The control panel is touch-sensitive and lights up when touched. At the bottom of the screen there are several icons:
Domů (Home):
Either option lowers the projection screen down and turns the projector on. |
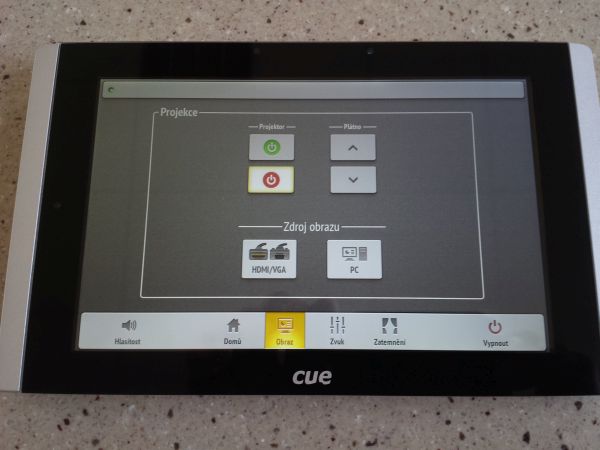
Obraz (Image):
|
|
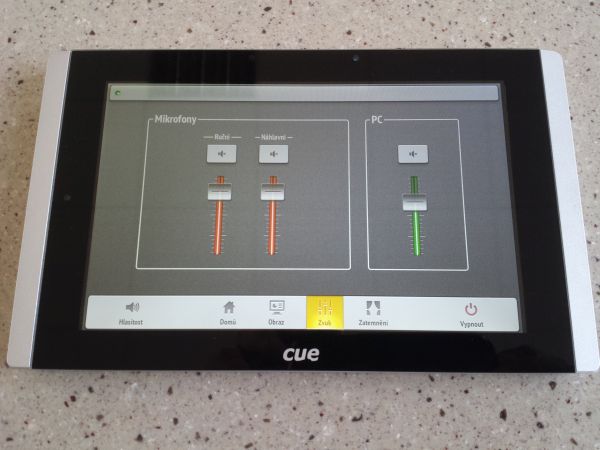
Zvuk (Sound):
|
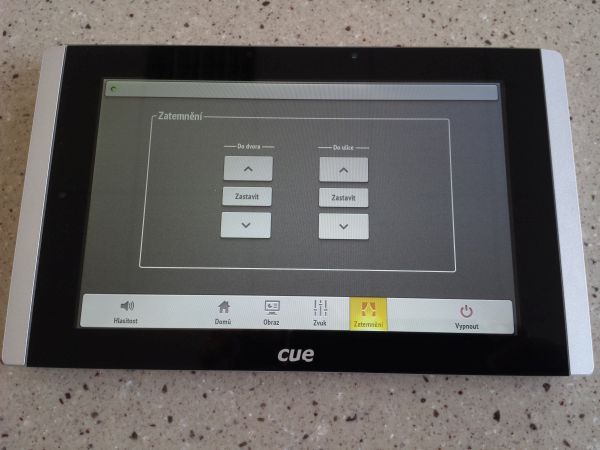
Zatemnění (Window blinds): You can pull up, stop ("Zastavit") or lower down windows blinds on both sides of the room ("Do dvora" = facing the courtyard, "Do ulice" = facing the street). |